Showing posts with label DIY. Show all posts

Tuesday, March 9, 2010

DIY win and fail...

Let's do the win first, because it's happier (sure why not, we'll go with that). My tossing bouquet was something that I wanted to be different than normal. Everyone has been to a wedding and wanted to catch the bouquet and maybe you have caught one (I did once). At our wedding, I am giving all of our single ladies a bouquet to catch. Each flower in the "bouquet" will be its own bouquet. Here's what I did...

Take 20 parts flowers...
Photobucket

And add equal parts of ribbons along with some scissors.
Photobucket

With a snip, snip here and a little sweat there, the idea takes shape.
Photobucket

Each bouquet was tied with a ribbon and I let the strings hang because I thought it was adorable and fun. Here is how they turned out all together.
Photobucket
When the time comes to throw, I will hold them all together like one bouquet, but then they will separate and then every girl can catch one (hopefully, as long as there are only 20 or so girls to toss to).

So that's my DIY win, now for the fail. My card box did not turn out how I wanted it to, so I went to Michaels and bought one. I'm the bride, I'm allowed to do that if I want to.

In other news, I got my dress back from the seamstress today!! Yay!!! Now she is hanging in my room, teasing me that I get to wear her soon. Argh!!

I have one more day of work left! Whoopee!! And then I can devote my few remaining days to getting everything together and trying to remain calm. Good luck to me.

I am in the process of getting the bachelorette pictures together, so don't worry, that post is still on it's way (although might not come until after we get back from our honeymoon).

4 days!!!

Thursday, March 4, 2010

Single digits!! *happy dance*

9 DAYS UNTIL OUR WEDDING!!!

So much is going on right now that I haven't really had time to blog! Sorry!

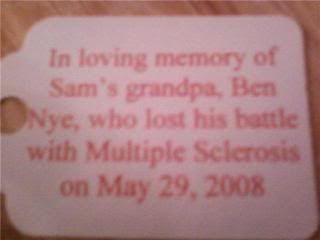
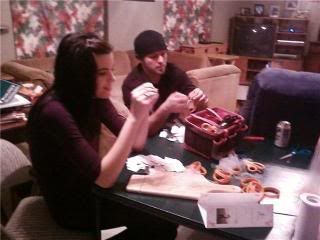
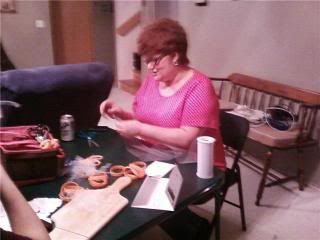
On Tuesday, my granny came over and we had a work party. We spent the evening putting tags on bracelets and ribbons on bubbles. I took pictures with my phone so you can kind of see what we were doing.

I had to print out 250 little tags and then punch holes in all of them to put the ribbon through.
Photobucket

Photobucket

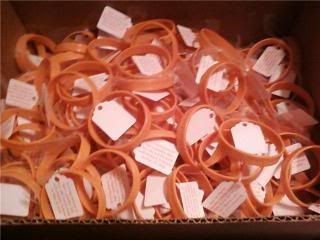
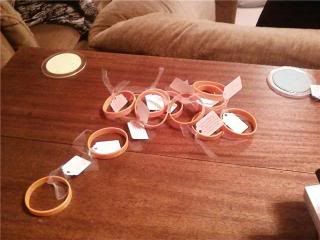
Granny, my sister, and her fiance spent the evening threading the tags onto ribbon and then tying them around the bracelets. All 250!!
Photobucket

Photobucket

It took a while, but we got all of them done.
Photobucket

Photobucket

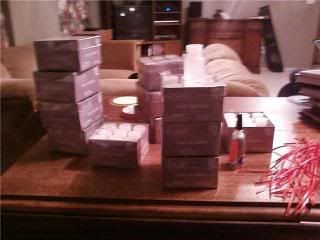
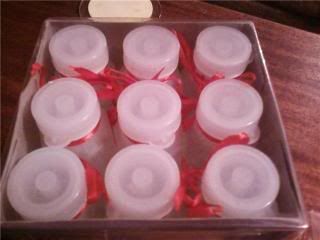
Then I got to working on the bubbles. I ended up getting all of the red ribbon done, which is only half, but now I only have half left. It's not so bad I guess.
Photobucket

I could have made it a lot easier on myself by just tying a not and clipping the ends short, but the bows were so cute! (Not that you can see them very well in the picture, but oh well. Take my word for it!)
Photobucket

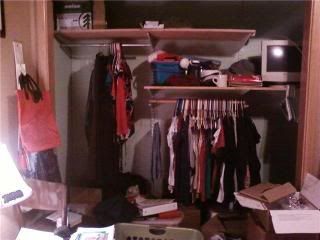
This week I've been going through my closet and I finally decided to just pick an outfit for each day of the week until the wedding. Then I could take the rest of my clothes over to our new house. I was shocked when my clothes went from filling two rods to being about a foot thick on ONE rod!!
Photobucket
Might not be easy to see in the picture, but the small amount of clothes on the left are the ones I am wearing this week and next. I had a "moment" and had to sit down and just stare at it. Where has the time gone!!? I only have 9 days left and a fairly long to do list left!!

It is going down though, here it what is left:
-Print poem for memorial table (will take two minutes)
-Take engraved vase to Your Marketplace (again, two minutes, minus travel time)
-Make card box (I need to find plain, red wrapping paper & an appropriate cardboard box
-Pick out young-ish pictures for under glass (mine are done, now I just need Nick's)
-Put ribbons on bubbles (only orange is left)
-Ribbons on tossing flowers (I have both, now I just need to sit down and do it)
-Decorate centerpieces (I need to get red floral paper to put around the pot)
-Make CD for DJ
-Make CD of prelude & postlude music
-Print vows & 'Union' poem on invitation paper (need to get Nick's vows)
-Finalize rehearsal dinner details (mostly done)
-Gifts to parents
-Pass out schedule to all involved (only have a few left to pass out)
-Pay videographer
-Buy reception food (doing this on saturday, we're doing a nacho bar!)
-Honeymoon itineraries to parents
-Get pedestals from Beth and Matt (bridesmaids is doing this)
-Pack bags for honeymoon!
-Prepare bag to take to wedding (with emergency kit)
-Guys' final fittings & pick up tuxes (next thursday)
-Rings cleaned (day before)
-Assign someone to be in charge of ring bearer's dish, flower, girl basket, etc.
-Designate someone to transport card box to McClelland
-Go to credit union for honeymoon, tip, & emergency money
-Paint fingernails & toenails
-Pick up rentals & pay balance (day before
-Set up ceremony (morning of day before)
-Set up reception (afternoon of day before)
-Gifts to bridesmaids (at rehearsal)
-Have someone pick up my bouquet and the memorial flowers (morning of)

Whew! Still a long list, but we'll get it done.

This weekend we're buying the food for the reception (like I said in the to do list) and it's my bachelorette party!! Stay tuned for THAT post and pictures!!

9 days!!!!

Thursday, October 15, 2009

Save our date!!!

Well we officially mailed (most of) our save the dates last saturday and I can't wait to hear what people think of them!! We have a few stragglers that haven't gone out because of lack of address, but hopefully they will be going out soon. I am really pleased with how they turned out!! I made them through Zazzle and it was super easy and a great price (so if you are looking to make postcards, T-shirts, etc. check them out).

Photobucket

Photobucket

The only problem I have is that I have 400 of them!! I ordered 200 (and only really needed to order 150), but Zazzle sent me two orders of 200 so I got to keep the extra without being billed for it. Now I just have to figure out what to do with 250 extra save the dates. Wallpaper maybe? :)

149 days from today!! Whoopee!!!!

Thursday, September 17, 2009

Table mock up

Friday night my bridesmaid, MOH, & I had a party to celebrate the wedding being in six months (I know, we’ll do anything for a party). And by party, I mean we went to dinner and then made a guest table mock up to see how it will look. Here is the diagram I made in Excel:

Photobucket

And here is how our table turned out.

Photobucket

Photobucket
(Note: These pictures were taken with my cell phone because I STILL have not bought a charger for my camera battery.)

Now before you go dogging on my table, that is NOT going to be the centerpiece. That was a random vase and plastic flowers I had lying around to simulate our fruit centerpiece. Also, I would like to note that the two lilies in the vases will be orange, not white (and they won't look ridiculous staring straight up in the air). Let’s see, what else? Our candy dishes will have M&Ms in them, not Dove’s chocolates; and I think we will have red and clear marbles in the votive holders instead of only red. An LED candle (or throwie, haven’t decided) will be buried in the marbles so it will glow through the marbles.

So here is what is going on our tables:
-Red or orange table cloths (alternating)
-White table runners
-fruit and chocolate centerpiece
-Under centerpiece will be a piece of glass with our engagement pictures underneath
-2 bud vases with a single, orange Asiatic lily in each
-4 votive holders with red and clear marbles and an LED candle/throwie
-2 candy dishes with red, orange, and white M&Ms
-Information cards with a website where people can upload their pictures

What do you all think of our table? Any suggestions?

Oh, before I forget SIX MONTHS UNTIL THE WEDDING!!! I couldn't help but throw that in here. :)

And another little note, we received our save the dates in the mail and they are beautiful if I do say so myself (and I do). I will show you when they have been sent out. I'm so excited!!!

Wednesday, May 6, 2009

First DIY project

So I've been looking into getting engraved toasting glasses for the party, an engraved vase for the sand ceremony, and an engraved memory vase for Grandpa Nye. All that added up is expensive!! So I decided to do my own glass etching and hopefully save some money (we'll see if I actually save money).

Will need:
-8 glasses - found box of 10 pilsners for $11.00 and will use those (for the record, I don't recommend using pilsners because the one I bought were tapered and the stencil doesn't really like it, but I did get it to work). The extra two glasses will probably be used in the sand ceremony for our separate colors
-2 vases - $1.00 each at Dollar Tree
-Glass etching kit - this was the expensive part. I got the starter kit, a wedding stencil kit, and two alphabet kits for a total of about $50.00. Starter kit includes: Cream, stencils, paintbrush, Popsicle stick
-Masking tape - about $2.00
-Gloves - $1.00 for a whole bunch
Total spent: about $65.00. So far Bridesmaid Megan and I have done 3 of the pilsners so there may be more costs later

I took pictures to show how easy the process was (and it was super easy if I could do it).

Step 1: Wash the glass to make sure there are no fingerprints. Cut out and position stencil on the glass. Tape down with masking tape.
Photobucket
This process was a tad difficult because the glasses were tapered and we had to measure a couple times to get all of the stencils in (roughly, I hope) the same spot.

Step 2: Use a Popsicle stick (or fingernail, or back of a butter knife, etc.) to transfer stencil from plastic to glass.
Photobucket
(Yes I switched glasses between pictures. I forgot to takes pictures of the first glass I did.)

The stencil bubbled slightly again because of the tapering of the glass. On something that is the same width from top to bottom, it won't be an issue. The bubbles are pretty easy to rub out anyway.

Step 3: Make sure there are no holes in the stencil that aren't supposed to be there and cover the edges with tape.
Photobucket
Taping down the edges of the stencil insures that you won't get any of the edging cream where you don't want it. You will also want to put tape over any holes that got put in the stencil.

Step 4: Spread a generous amount of etching cream over the stencil.
Photobucket
Make sure you can't see any of the lettering or design and let it sit for 60 seconds, that was all the time that was required for this cream. (I left the cream on for about 15-30 seconds longer and it looked just fine.)

Step 5: Rinse off all of the cream and remove the tape and stencil.
Photobucket
Run the glass under water to remove the rest of the stencil that didn't come off with the tape.

Step 6: Wash the glass and check out your handiwork!
Photobucket
You can kind of see the etching, but it was really hard to get a good picture, so I will try again later.

The process doesn't take very long. Megan and I had an assembly line at the beginning so all of the stencils are on and positioned and that part takes the longest. I really like how they turned out!